Roasted chickpeas to the rescue!
As a registered dietitian, iron is a nutrient that I am always focused on for kids. Iron is incredibly important in the first 1-2 years of life, but it continues to be important as they grow.
But it isn't always the easiest thing for our kids to get. It's easiest source is red meat, but not only does meat tend to be expensive, a lot of kids aren't big fans of it. And that's where these roasted chickpeas come in!

Iron Content in Chickpeas
Chickpeas are a great source of iron. In one half cup of cooked chickpeas (about 80 g for those of you using metric!) there is 2.37 grams of iron. For reference, kids age 1-8 need between 7 and 10g of iron. (Ref)
Usually when we talk iron foods, the portion sizes are very large for kids to actually eat. But trust me when I say that 1/2 cup of roasted chickpeas is something that kids will chow down on in no time! We can easily go through 1-2 cups of roasted chickpeas a day in my house with just 2 kids.
Why Iron is Important for Kids
Before we get to the recipe, let's do a quick refresher of why iron is so important in your child's diet. Iron helps you child to grow and develop properly. It is hugely important for delivering oxygen around your child's body, and helps with brain development.
Iron deficiency is one of the more common concerns we have for children, and can have long term effects if not treated properly. Which is why any time I find a kid-loved food that is cheap and full of iron, I share it far and wide.
Roasted Chickpeas as an Iron-Rich Snack for Kids (and Adults!)
Chickpeas, also known as garbanzo beans, are technically a legume. They're in the same family as other beans, as well as peanuts. Legumes tend to be a great vegetarian source of iron, as well as protein and fiber.
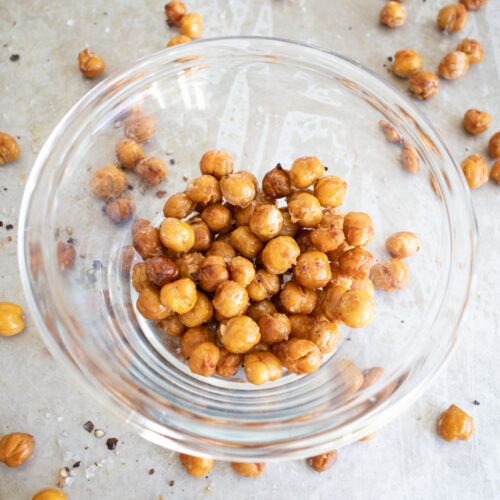
Roasting the chickpeas gives them an amazing crispy texture, and turns them a light golden brown. On their own, chickpeas can have a rather earthy flavor, but roasting them in the oven lends them a much more mellow flavor. And that's before any other seasonings!
That mellow flavor and crispiness tend to be big hits with kids.

Are Roasted Chickpeas a Choking Hazard for Kids?
Due to their small round shape and harder texture, crispy chickpeas can be a choking hazard for younger kids. I don't recommend them made as written below for kids under the age of 3.
But that doesn't mean you can't take advantage of them! If you have a child between 2 and 3, try cooking them just a few minutes less so they are easier for your child to bite into. For toddlers 1-3 years old, try smashing them lightly with a fork before cooking them. Under 1 I would recommend simply serving chickpeas smashed but not roasted. Feel free to use the same seasonings, though!
As a reminder, no matter the age of your child, ensure that they eat sitting down and not moving. That alone is one of the best ways to prevent choking.
Tips to Make Crispy Roasted Chickpeas
If you look any where on the internet, you'll find endless tips to make crispy chickpeas. At this point, I might just have tried them all! Here are the ones that make crispy roasted chickpeas for us every time:
1. Be sure to dry the chickpeas with a kitchen towel.
Getting as much moisture off of them as you can helps them to get crispy in the oven. This is hands down the most important step for making crispy chickpeas. While you're drying, pick out any of the chickpea skins that come off so they don't burn in the oven. No need to actually remove the skins from the rest of the chickpeas, though.

2. Cook the chickpeas directly on the pan.
I can't remember the last time I cooked something without parchment paper or a sil-pat lined baking sheet, but for these it makes all the difference in the world. There still shouldn't be much cleanup required as you'll be coating the chickpeas with olive oil.
3. Add any spices or seasonings AFTER the roasted chickpeas come out of the oven.
Spices and seasonings have a tendency to burn in the oven. That doesn't make for a pleasant snack! Spices and herbs will still stick to the chickpeas after they're roasted. And it'll be much easier to change up the seasonings and try new ones if you want!
4. STIR the chickpeas at least once halfway through with a spoon for the crispiest chickpeas.
DON'T just shake them on the pan. Most ovens have hot spots, and while shaking them on the baking sheet will turn them around so different sides of the chickpeas don't burn, it doesn't always shift them around on the pan. Take a spoon and make sure they are moved around inside the pan. It will make getting all of the chickpeas crispy, and not just some of them, much easier.
5. Cook a bit longer than you think you should!
You might be tempted to take the chickpeas out of the oven once they are just lightly golden brown. But I find that by leaving them in just a few minutes longer, you really can get a nice crisp to them and they will last for several days while maintaining their crispiness. You don't want to burn them, but even a deep brown color will give them a nice toasty flavor that doesn't taste burned. So experiment and play with how long you can leave these in the oven for.
Last but not least...
If you're feeling adventurous, I have one last tip for you. It is by no means necessary, though! I find that cooking dried chickpeas myself instead of using canned chickpeas can result in a bit of a more even toasting. They tend to keep their size more and have a more robust flavor.
Believe my when I say this doesn't always happen in our house, though. I frequently reach for canned chickpeas to make this recipe.
But if you find you enjoy these roasted chickpeas, cooking dried chickpeas might save you a bit of money as well. Dried chickpeas tend to be much cheaper than canned chickpeas, and they result in less waste, to boot.
Roasted Chickpeas Recipe Variations
The beauty of this recipe is that endless variations are possible. By waiting to add seasonings until after the roasted chickpeas come out of the oven, you can even try two different kinds of seasonings with one can of chickpeas.
The first addition of salt added before cooking in this recipe is there to help reduce the amount of seasoning needed after they come out of the oven. It isn't strictly necessary, and if you are using chickpeas with a decent amount of sodium in the can already, you can leave it out. But otherwise I find that less salt and pepper, or other seasonings, are needed if it's used.
I'm sharing the version we have settled on as the favorite in my family, but we frequently switch it up and try lots of different spices. There is no right or wrong way!
Some of our favorite spices to season roasted chickpeas with include smoked paprika, garlic powder or garlic salt, and salt and pepper.
Any salt will work, we tend to stick with sea salt here, but any fine salt, including kosher salt, imparts the same flavor. If you use the pepper called for, freshly ground works the best. The variation in size of the flakes, and the fresh flavor gives the roasted chickpeas a great flavor that you are unlikely to get with pre-ground black pepper.

Let your kids make the variations!
I am huge on getting kids in the kitchen, and one of the best ways to involve them is to let them choose which spices to add. Try sweet with some fall flavors like cinnamon, nutmeg, and ginger. Experiment with chili powder or curry powder. Let them combine the most random flavors they can think of to experiment with how it changes the flavor and if they would want to replicate that combination again for another batch of roasted chickpeas.
Try setting up a sampling station when you first make these. Add one spice to a small bowl of the roasted chickpeas, and repeat with more bowls and other spices until there are no more chickpeas to use. Then have the whole family participate if they want, and sample the different options. It can lead to some amazing discoveries, for both you and your child!
If they participate in the final results, they're much more likely to find an option that they enjoy, and one that they want to eat.
How to Store Roasted Chickpeas
Storing roasted chickpeas tends to be more about what you SHOULDN'T do than what you should. Don't seal them in an airtight container like you would normally do for other foods. It will result in them going soggy from any excess moisture.
Don't store them in the fridge, either, for the same reason.
Instead, I find the easiest way is simply to throw a kitchen towel over the bowl of roasted chickpeas and leave them on the counter. Not only does this result in chickpeas that stay crispy for a few days, it means less dishes for you to wash.
For some seasoning options, storing the roasted chickpeas this way can even result in some more melded flavors making them even better the second day.
What to Eat Roasted Chickpeas With
Our favorite way to eat these roasted chickpeas is simply nibbling on them for snack time. But they are great in lunchboxes, too.
They are also a great option to add an iron food to a recipe that might not have one. Think adding it as a topper for a soup that doesn't have beans or meat in it. Or sprinkling them on a meat-free pasta dish. The options are endless to use these as an iron boost to any meal or snack.
Basic Roasted Chickpeas
Equipment
Ingredients
- 1 can (15oz/ 400g) chickpeas low or no sodium if possible
- 2 tbsp extra virgin olive oil
- ⅛ +1/4 tsp sea salt or kosher
- ¼ tsp fresh black pepper
Instructions
- Preheat oven to 400F or 200C. Use the convection or fan forced setting if you have it.
- Drain and rinse the chickpeas. Place them on a kitchen towel and pat them dry. Remove any chickpea skins that come loose during the process.1 can (15oz/ 400g) chickpeas
- Place the chickpeas in a medium sized bowl and add the olive oil and ⅛ tsp of the salt. Toss chickpeas until well coated.1/8 +1/4 tsp sea salt, 2 tbsp extra virgin olive oil
- Spread the chickpeas directly onto a baking sheet and place in the preheated oven.
- Roast for 25-40 minutes, removing once or twice throughout this time and stirring the chickpeas with a spoon to rotate them around the pan. Chickpeas are done when they are golden brown and crunchy. They will continue to harden a bit as they cool, but if they are at all soft in the middle return them to the oven for a few more minutes.
- Once cooked, remove the baking sheet from the oven and let cool for 5 minutes.
- Place the roasted chickpeas into a clean bowl. Toss with salt and pepper until evenly coated, adjusting to taste. (Different chickpeas will have stronger or more mild flavors and different amounts of sodium, pepper may be stronger or more mild, etc. Always go by your own taste buds.)1/4 tsp fresh black pepper, 1/8 +1/4 tsp sea salt
- Store in a bowl on the counter with a clean kitchen towel spread over it.
These roasted chickpeas are such a great option for snacks, lunches, and even dinner for the whole family. They are a staple in our house, and a great way to get a bit more iron into everyone!
If you try these, be sure to tag us on Instagram or let us know below. And be sure to share any great seasoning options that you come up with!
